Marc's Conversion - Finishing Touches


Pedal box cover UPDATED!April 2001

This was originally some weird plastic thing. Held together with duct-tape.
Mmm... nice.
So I made a new one from some Ali sheeting I had lying around. I first made cardboard templates of the 3 pieces (2 sides and a front/top). I then made the required cutouts in the cardboard pieces so that they cleared all the obstructions etc.
I then used the templates to mark up the Ali sheeting using a permenant marker. Once the main outline was transfered I added extra shapes which form the "flaps" between the panels.
Once this looked ok I cut the Ali panels out. I cut using a combination of a pair of tinsnips, a metal chisel and a dremel. I then filed off the edges using a grinder to ensure there are no spikey bits.
I bent the sheets to get the flaps etc using a workbench with two pieces of steel angle-iron to give nice hard edges to press up to.
Trial fitting of the bits is required at each stage.

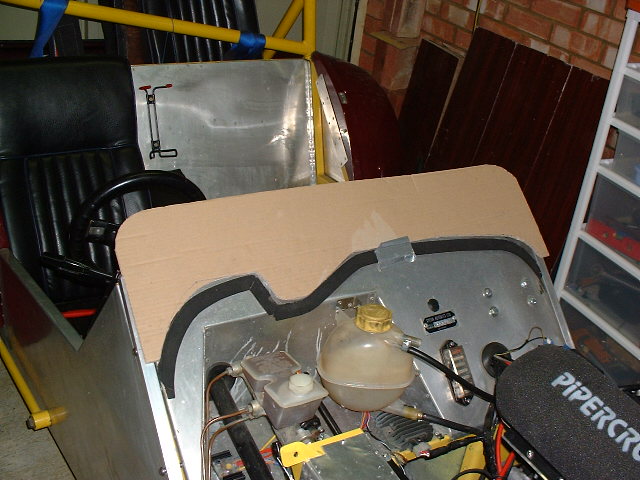
When I was happy with the fit of all the panels I put them in position, secured it all solid with duct tape and then drilled the existing holes through from the pedal box. I then secured the pedalbox to the cover with self-tapping screws.
You can then go around all the "flaps" and drill/rivet them together.
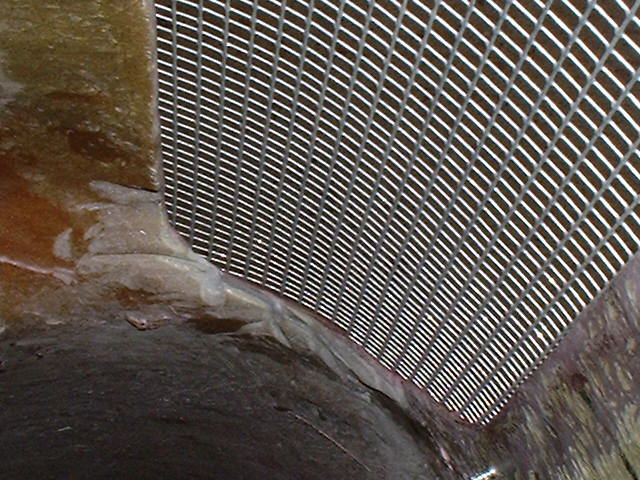
When done it should be reasonably well sealed. For extra sealing power a bead of silicon sealant was run on the inside of the edges of the cover to act as a rubber'y cushion.

pedal_box_lid.jpg 
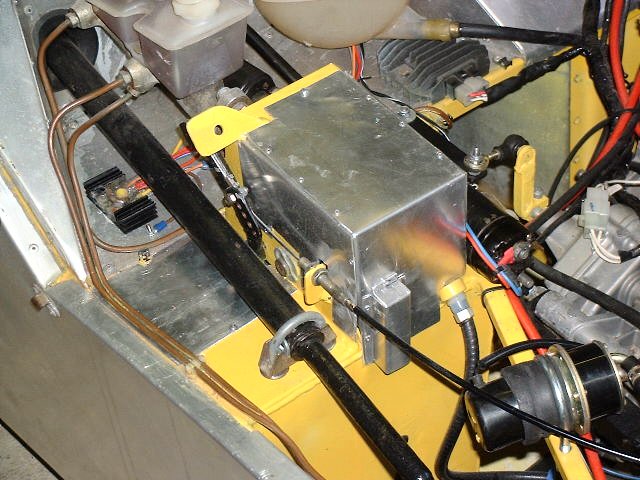
Pedal Box cover in position
pedal_box_lid_and_fuel_pump_bracket.jpg 
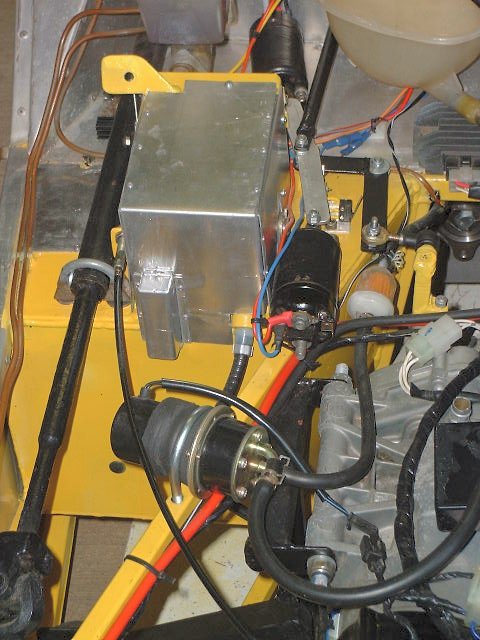
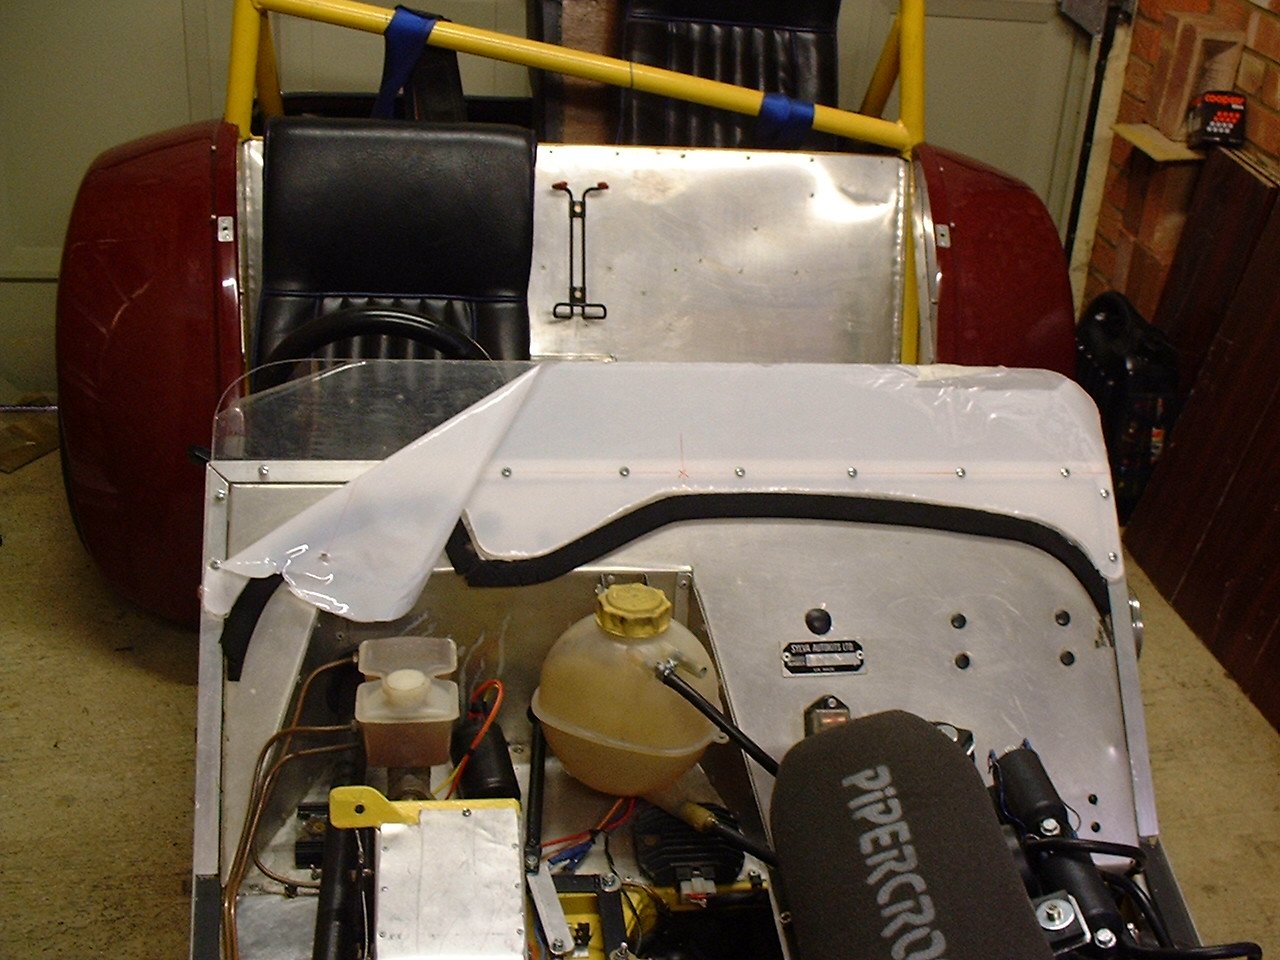
Pedal box cover from the other side, note the revised mounting of the bike engine fuel pump too - much more solid now.


Aeroscreen UPDATED!May 2001

The Striker windscreen is an awkward beastie.  It is raked at a mad angle that makes getting at the dashboard tricky.  It is also heavy (6.5Kg) and is useless without the ugly sidescreens.  Take away the rest of the windscreen gear and you can save 9Kg.


peter_carr_aeroscreen_1.jpg  peter_carr_aeroscreen_3.jpg

peter_carr_aeroscreen_2.jpg peter_carr_sidescreen.jpg
For a Striker Aeroscreen I turned to Peter Carr.

He has a home-made screen shown in the photos here.  

He is also experimenting with funny side flaps and has also made his car into a dukes-of-hazard type with fully enclosed sidescreens!


aeroscreen_surround_cut.jpg  aerosceen_emplate.jpg

aero_in_place.jpg  aero_closeup.jpg

For my screens I opted for something a little different.

I wanted to retain the same mounting holes as the windscreen uses, and drill no new ones at all.  A swappable setup.

To do this I made a frame from 20mm Ali Box section.  I put this down the side of the screen, and marked where I wanted the 90degree bend to be.  I then cut a "V" shape for this with an angle grinder, making sure I didn't completely sever the tubing.  See the photo.  I then filed the edge clean and GENTLY bent the thing into a right angle. 

Position this across the windscreen edge, secure with duct tape and work out where to put the next bend.  Be careful as you need to allow for the material thickness in the bend radius.

One made the surround is then drilled to match the existing mount holes (2 per side 8mm for me).

Once secure make yourself an aeroscreen template.  I used some cardboard.  it took two attempts to get the curves into the bodywork correct.  I opted for a 4" high screen which from the Stoneleigh show seemed to be the standard for all seven style cars.

I had a local plastics company (http://www.edplastics.co.uk) use my template to make the screen.  Here you can see it fitted after I have drilled a lot of holes (for self tappers into the Ali frame). 

I left the packing covering on to help prevent scratches.

aeroscreen_inplace_bonnet_off.jpg  aeroscreen_inplace.jpg The completed screen with and without the bonnet in place.  

The screws are stainless self-tappers.  Use washers to help prevent cracking the screen when you tighten the screws.


Seating UPDATED!May 2001

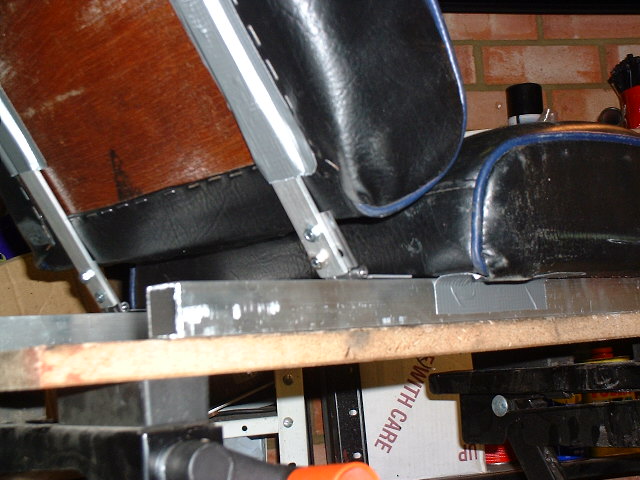
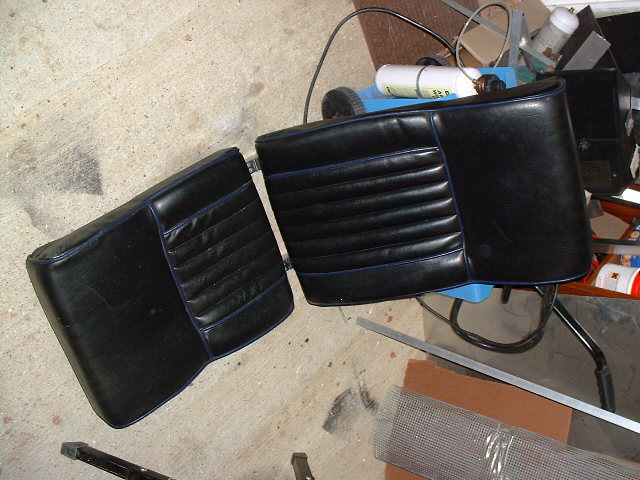
I was never 100% comfortable in the car pre engine install. Being a short-arse I had to move the seat forward and I always felt like I was sitting in the boot. I had a wooden board behind the seat but this was not ideal!

I wanted to have the seats adjustable and raise them up a little.  I looked at new seats but to be honest the cars condition really doesn't warrant posh new expensive seats. I have a couple of GRP bucket seats but they are not a pair and are pretty uncomfortable to sit in (at least for me).

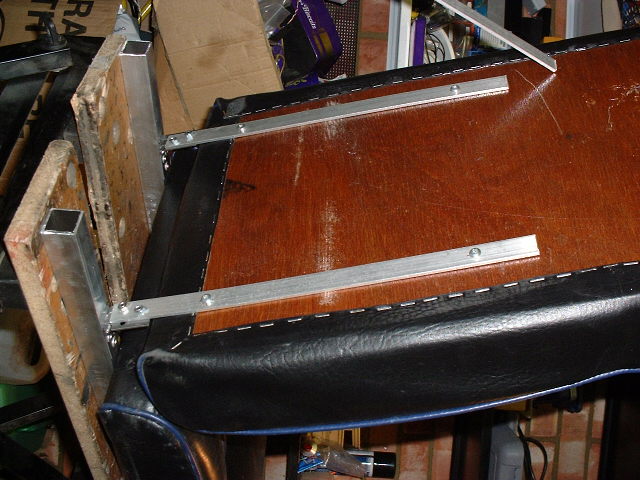
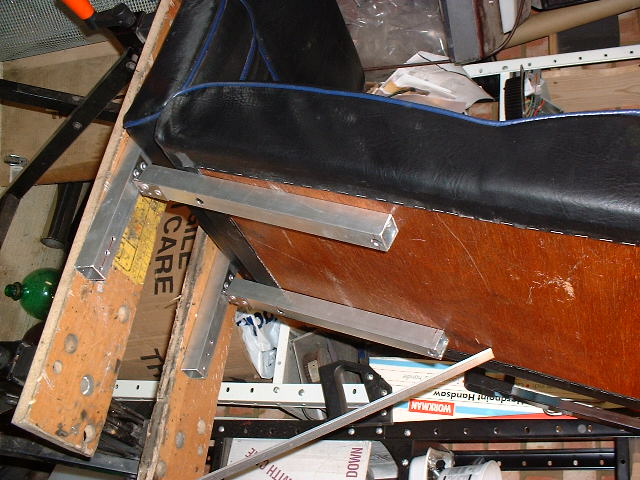
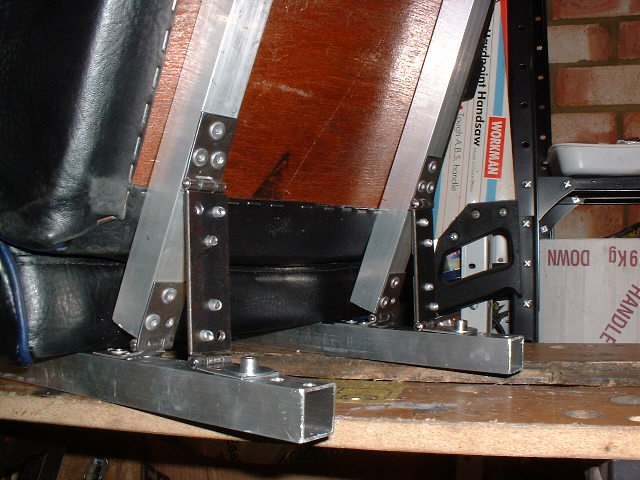
So I elected to try to use the existing pair of two piece seats. I realised that rake adjustment can be obtained by linking the two pieces together (seat back and seat cusion), and hinging them. I sketched some ideas and came up with a deckchiar type adjustment with a support stay coming out the back to prop the seat up. For material I used some steel hinges, some Ali box section, and some steel (3mm) strip.

The first attempt actually used Ali strip for the rear seat back rails. These bent very easily though so I ditched them and used more Ali box.

The completed seats are quite strong (at least for me) and the back can be adjusted to be at 3 different rake angles. The seat bottom rails were cut to the right length to push the seat forward enough for me, and raise the seat by 1". This is now pretty much the perfect driving position for me (I think).

seat_back_test_fit_ali.jpg  

Here is the test fit of the seat rails and back supports.  Duct-tape is such a marvelous thing ;-)

seat_hinged_rear.jpg  seat_hinged.jpg Here the first Ali strip supports are fitted to the hinges with bolts.
seat_rear_supports.jpg  seat_hinged_rear_close.jpg With support struts hinged on you can see the basic deck-chair style.

After one trial you can see how easily the Ali strip bends (as I expected to be fair).

seat_rear_stronger.jpg Here the Ali strip has been replaced with sturdy 1" Ali box and the seat re-hinged and rivetted.
seat_stronger_supports.jpg Finally the struts come back.  All joints are rivetted and the thing is solid at last!


Bodywork UPDATED!April / May 2001

The original car was finished in a maroon (Bordeaux) gelcoat. The owner previous to me was an artist and hated the colour. So he started to paint it. But he didn't finish. So the car has a maroon rear, a yellow bonnet and green cycle wings! It looks like a Harlequin!

With this in mind I wanted to tidy it up. Although I'd really like it bright yellow I decided to keep the easy bit (the rear) and paint/change the rest to match.

I checked the bonnet fit and found it was hitting my header tank and my thermostat.  I moved the header tank down about 7mm by drilling extra holes in it.  I undid all of the water pipes around the thermostat and took the thermostat apart.  The top-pipe is an overflow and I found that I could move its position easily and have the pipes a little neater.

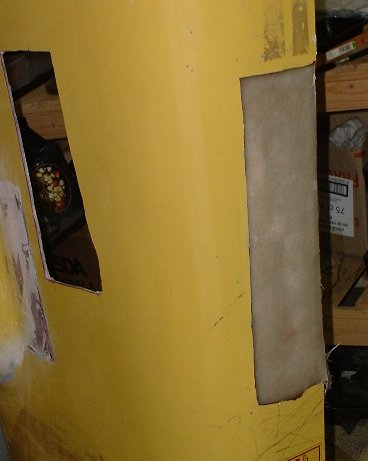
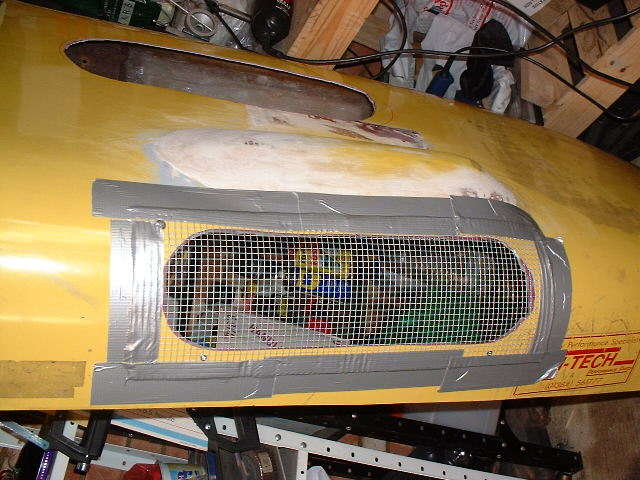
Old exhaust hole - patchup

fibre_glass_inside_1.jpg Completed first hole patched - view from the inside
fibre_glass_outside_2.jpg 
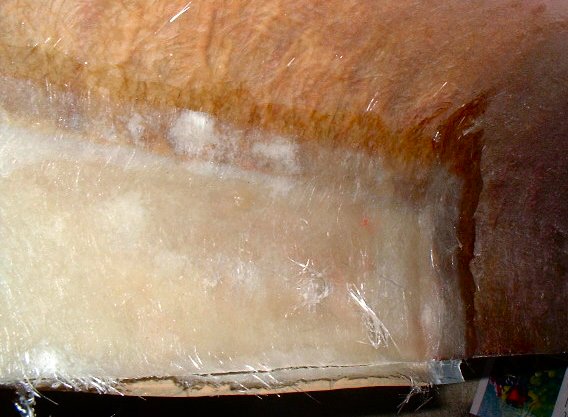
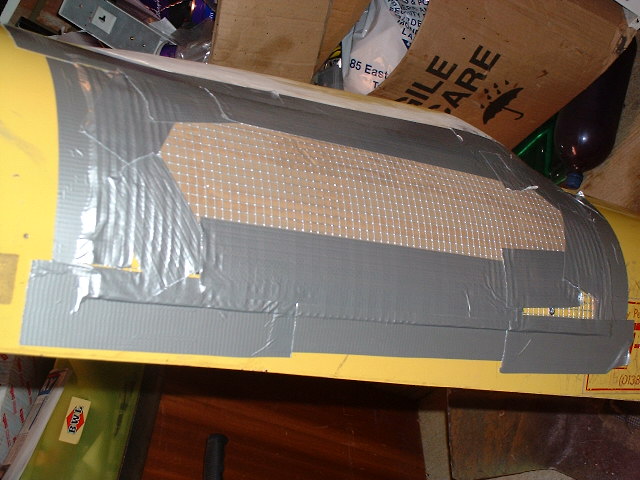
Peeling off the outside covering.  The brown tape is ordinary parcel tape. This has a nice shiny side which GRP resin doesn't stick to.

Duct tape holds this in position.

fibre_glass_outside_1.jpg 
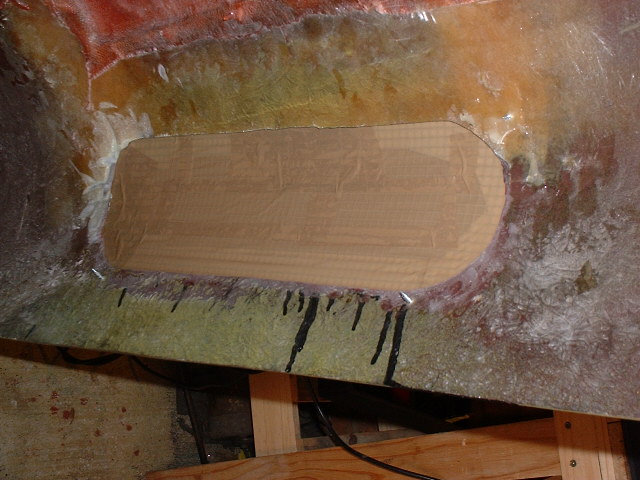
The completed first hole - patched from the outside.  With a smearing of bodyfiller and a sanding it should be ok.

Old air-filter hole - patchup


sidehole_prep.jpg

sidehole_prep_lined2.jpg

sidehole_prep_lined.jpg

UPDATED! May 2001

Here we have the preperation of the hole that used to have weber DCOEs sticking out.  

A curved hole needed to be patched.

The technique is:

  • get some wire mesh and put this over the outside of the hole
  • secure the mesh with some self tapping screws (drill pilot holes first or you'll crack the GRP)
  • Use duct tape to secure the edges of the mesh
  • Line the inside of the mesh with parcel tape (shiny side up).  This will be our "release agent" for the GRP
  • secure the outside with more duct tape.
  • Prop the bonnet on its side so that it is not stressing the hole

Then cutout the fibre matting layers and position neatly at one side.


sidehole_glassed.jpg Mix some resin and hardener and layup the job.  Ensure that you overlap on the inside to give the panel strength.
sidehole_filled.jpg Magic.

The outer stuff removed - we are left with a nice GRP panel.  Some sanding and filler and it will look like new (yeah right!).

filled_sidehole_1.jpg The next stage is to clean off the rough edges where the fibreglass comes through.  An angle grinder with a sanding flap disk is ideal but be careful not to take off too much!

Then use a layer of P38 filler across the whole section.  Try to get it into the nooks and crannies and don't use too much - or it will take longer to get off.  Do this a few times and you should start to fill all the holes.  Sand off and do again.  When you think the holes are filled get some cellulose stopper - this is a facecream consistency finishing filler.  Use this to cover the repair.  Use a finer grade of sandpaper to get the filler down.  Wet n dry 400 is good.  Repeat the stopper application as required..  

putty The panel should now be pretty well covered.  Now try some spray putty over the whole thing.  This will show up the last blemishes.  If you are going for concourse looks then you just have to keep going over and over until it is right.  My car is not a looker so I finished after a few loops round.  Once sanded with fine wet n dry (1200) it can be undercoated and then painted.
bonnet_spray_puttied.jpg UPDATED! May 2001
Both holes in the bonnet were gradually finished off with filler, stopper and spray putty.

Here is the side panel spray-puttied.

bonnet_finished_smoothing.jpg The bonnet was cleaned down with cellulose thinners to remove dirt, stickiness and oil.  It was then filled and puttied as required (depending on depth of holes).  The putty is finally wet-n-dried with lots of water to give a smooth blemish-free surface.

Here it is after I'd finished smoothing.

bonnet_being_washer.jpg Now wash it ready for undercoating.
undercoated_bonnet.jpg  undercoated_bonnet_colour.jpg The undercoated bonnet with a touch of top-coat for matching.  

The match against the rear sections gelcoat is difficult to access due to the light level in the garage.

Shall I add a yellow bonnet stripe?

bonnet_2.jpg
bonnet_1.jpg
The bonnet was the then sprayed with aerosols.  I took a piece of the old bonnet to the local car accessory shop (Discount Autoparts in Cambridge).  I matched the gelcoat colour as best I could to their huge stock of paint books.  I went for a BVLC 099/R Damask Red.  It looked a good match in the daylight and in the shop.  

They mixed me some spray tins (4 in all) and I used these.  The finish is not great and you can see some spray pattern lines.  I will get some more paint to put some more coats on.  I also think I should've used red-oxide as the undercoat, white being too bright.


Registering the car with the new engine

UPDATED!April 2001

You need to tell DVLA the new engine number and capacity (to get the cheaper road tax!).

Some people have had trouble with this so I elected to be pretty thorough.  I completed the form and enclosed the following documents:

This did the trick and 2weeks later I received a new document with 998cc and the new engine#.


Other Tips

t_cheap_tool_storage.jpg 2.8K UPDATED!Feb 2001
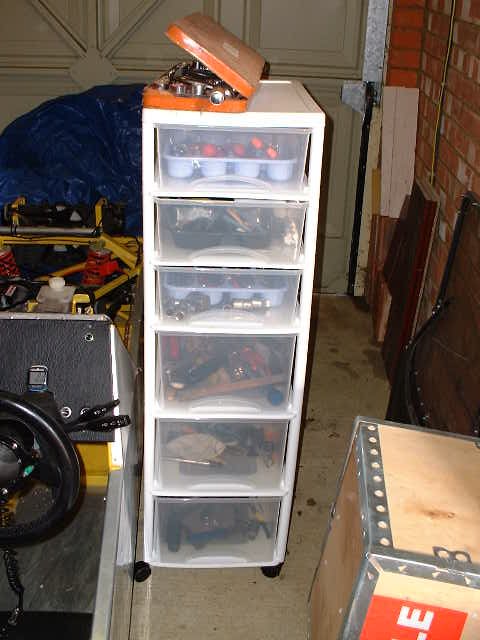
A cheap mobile toolbox solution.

Available from Argos for about £30.  Castors are a bit flimsy and the whole thing wobbles - but you get what you pay for!  I may make a steel frame for the drawers one day.


Index  |   Starting out  |   The main conversion  |   Making your own exhaust manifold!

Costs of conversion  |   Pictures of the car on the road  |   Improvements